 VVavy
Your Music, Your Motion: Audio Mapping And The Scene Editor In VVavy
A great visual can find the mood of a track on its own. Sometimes, though, you want to direct the details: a restrained response in the verse, a sharp hit on the beat, or a different visual when the chorus arrives. VVavy’s fine-grain controls and scene editor give you more say in both the movement and the shape of the whole sequence.
Decide what each control listens to
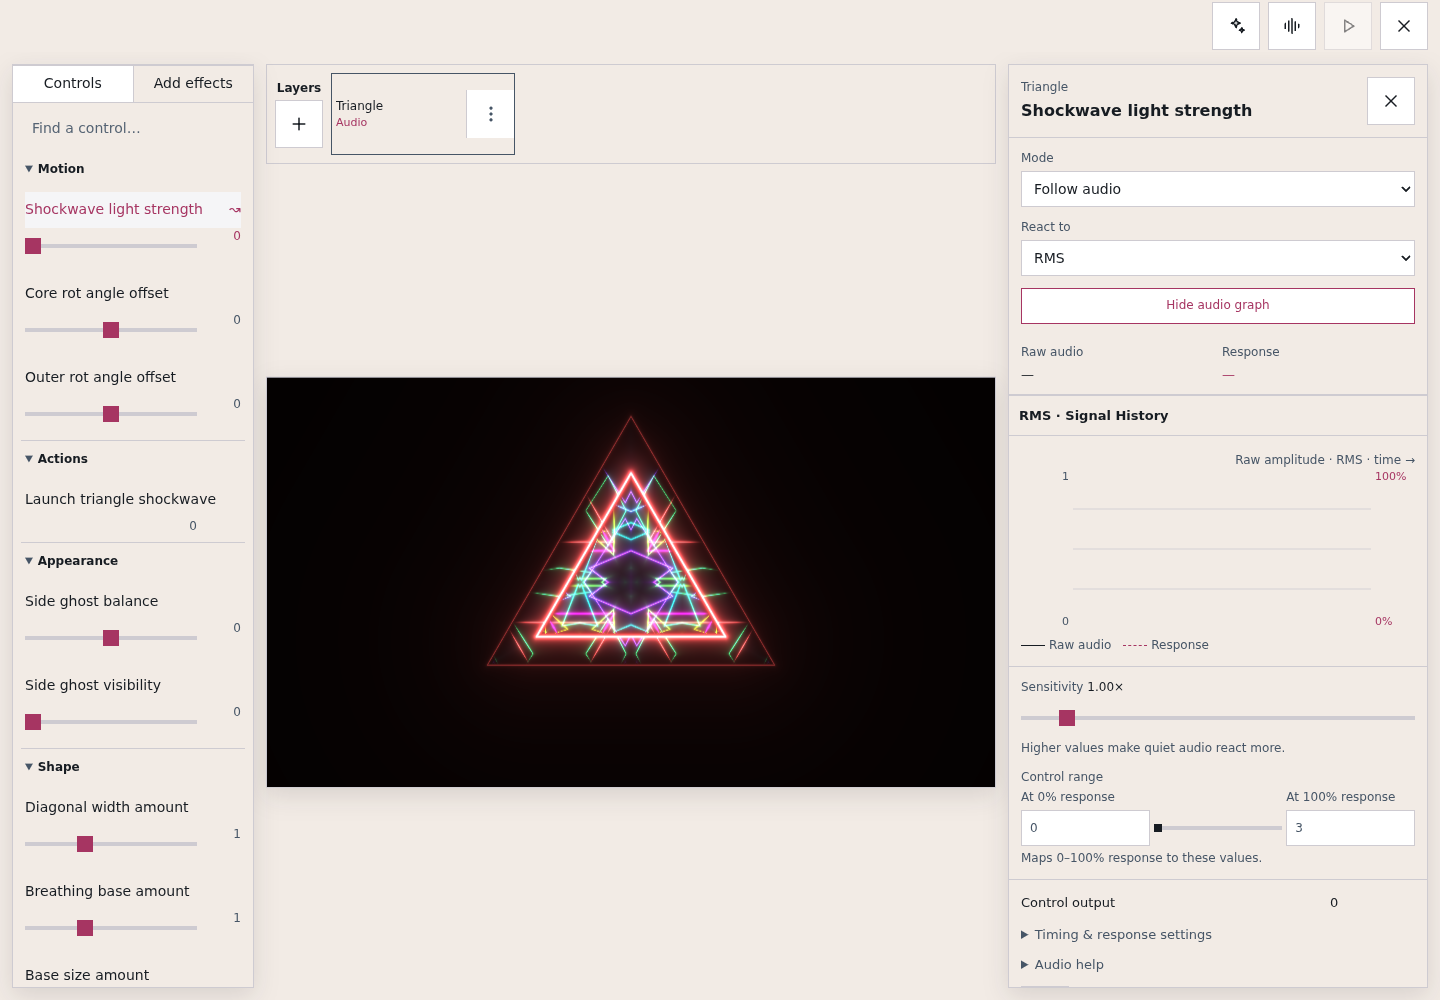
The visual editor lets you select an exposed control on your visual or effect layer and choose how it behaves. Original keeps its built-in behavior. Manual value holds a value you choose. Follow audio maps a selected audio source to the control, while Trigger responds when the signal crosses a threshold.
That means you can make individual choices instead of turning up the reaction of everything at once. Where a visual exposes the right controls, try a size control following low-frequency energy, or an effect responding to a beat. The controls available depend on the visual and layer you select.
Start with one mapping:
- Open the visual editor and select the visual or effect layer you want to adjust.
- Choose a control from the Controls list.
- Select Follow audio, then choose a source under React to.
- Play your audio and adjust Sensitivity and Control range while watching the result.
Give the reaction the right amount of space
A mapping is more useful when you can keep it within the look you want. Control range sets the values used at 0% and 100% response. Keep that range narrow for a gentle pulse, or widen it when a section needs more movement. Sensitivity helps quieter audio produce a stronger response.
Timing & response settings let you go further. Attack controls how quickly the response rises, and Release controls how quickly it settles. Input minimum and maximum shape the incoming range; Curve changes the response shape, and Invert reverses its direction. The live signal view and control output help you see what your adjustments are doing.
For a trigger, set the Trigger and Ready thresholds while listening. The signal must reach Trigger to fire, then cross Ready again before another hit can fire. This gives you a way to separate distinct moments instead of repeatedly firing while the signal stays high. Ready again does not reset your effect settings.
Build the bigger picture in the scene editor
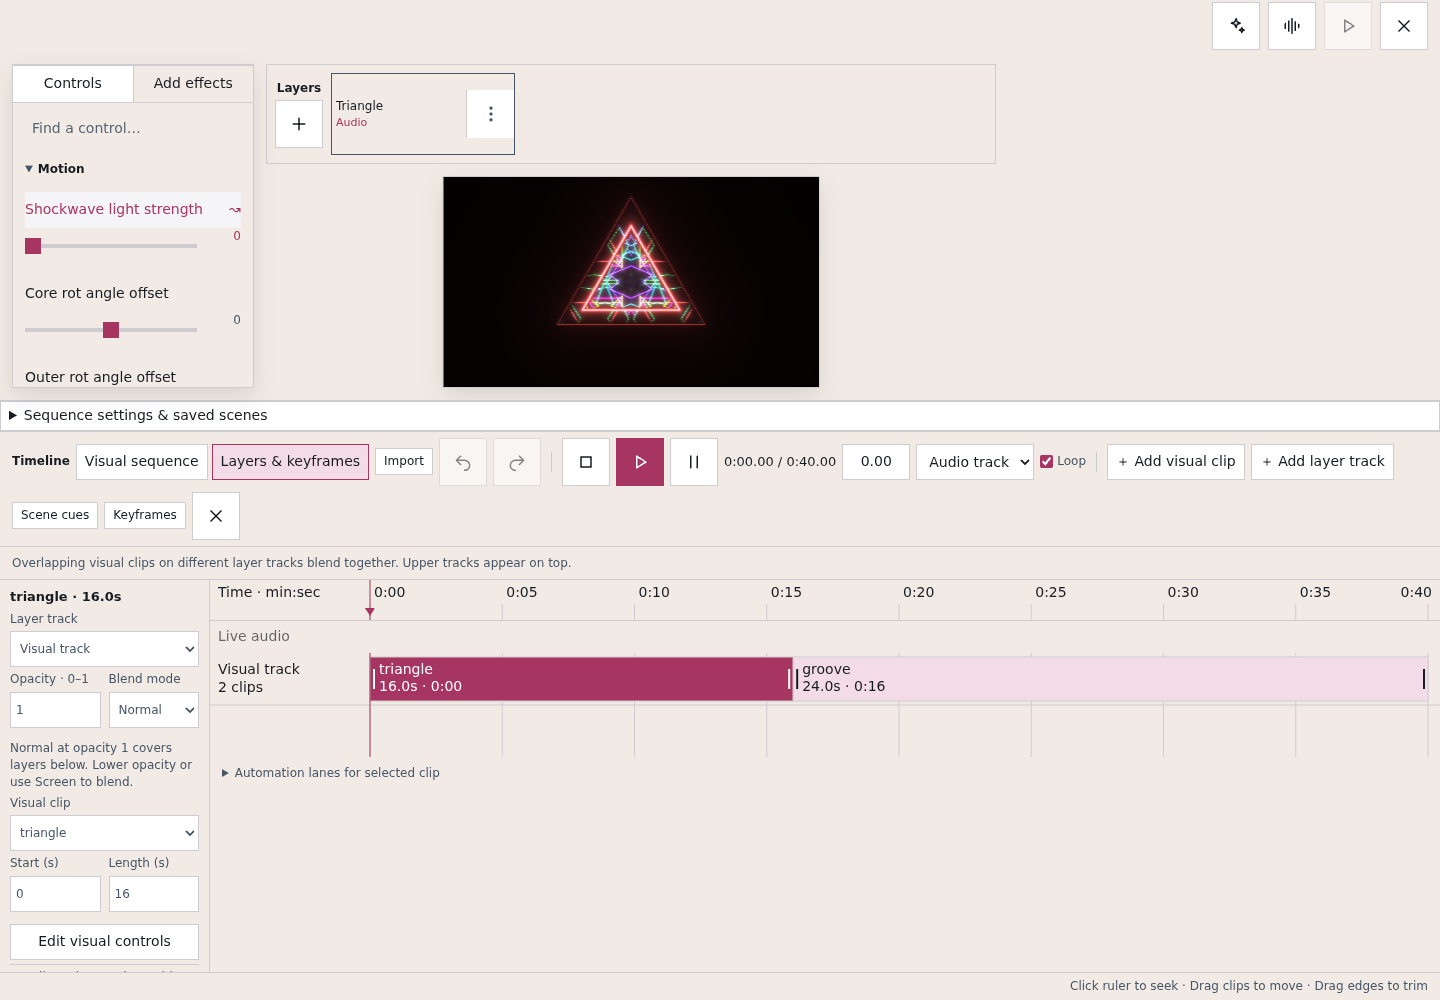
Audio mapping handles the moment-to-moment reaction. The timeline gives those moments an arrangement. Use Visual sequence to plan which visuals appear, then set how each change enters. A cut can make a change feel immediate; a fade can give it breathing room. Other transition options include Motion Mosh, Fluid Morph, and Chroma Tear.
Switch to Layers & keyframes when you want to work with clips and control changes over time. You can add visual clips and layer tracks, adjust a clip’s start and length, and set keyframes at the playhead. The timeline includes playback controls, undo and redo, looping, and a choice of Live show or Audio track clock.
Try a verse-to-chorus sequence
Start with two looks: one calm and one more expansive. On the first, keep a Follow audio mapping within a small control range and give it a slower release. On the second, try a wider range or a sharper trigger on a supported effect. Listen to each look before adding more mappings.
Arrange the two visuals in Visual sequence and place their change where you want the chorus to begin. Choose the transition and its length, then preview the passage. If a control needs a planned change at a particular time, move into Layers & keyframes and set it at the playhead. Use Play in app when you are ready to bring the sequence back to the stage.
The payoff is a visual performance with both structure and room to react. You choose the sequence and the limits; the music supplies the movement inside them.
Keep exploring
Common questions
Make the next sequence your own
Choose a visual, tune one audio mapping, and arrange a change in the scene editor.